Soundproofing a music practice room, are there effective ways?
This is a common question I get from my readers. I am not a musician. I can’t even play the guitar. But I do understand, using the science of sound wave, that the space that surrounds the playing band heavily affects the overall sound outcome.
If you are a musician, which I think you are because you are reading this post, you’ve probably gotten what I am trying to say here.
You go to certain places where you think you can play those loud sound-producing instruments. It could be sheds, garages, studios, and basements to practice the new piece.
But there is a problem, it is hard to find a perfect place that could contain the sound. Actually, there are two challenges in this instance.
First is the quality of the sound. If you are playing musical instruments in open spaces, you’ll not be able to achieve the quality of the outcome you are aiming for.
Second, neighbors’ disturbance. If you are practicing with the band in an open space, there’s a high chance that you disturb the people around.
This mostly happens especially if you are playing rock and roll. These two reasons forced musicians to find ways to correctly soundproof a music practice room.
So, is soundproofing a music practice room possible?
Soundproofing any room is challenging and sometimes arduous. Fortunately, there are materials you can use to ease the whole process.
The best way to soundproof a music practice room is by adding absorptive materials to the room. These materials are soft that will absorb the sound.
Soft materials are key to prevent the sound from bouncing back and forth for all the corners of the room.
The room that is made of hard materials like cement reflects the sound creating echoes all over the place.
Obviously, if you are a musician, you don’t want to have a music practice room that sabotages the quality of sound you are producing.
If you cannot rebuild a music room, you can add sound-deadening materials. The better materials you choose, the better the result.
Soundproofing a music practice room needs the following materials:
- Anchorage Fabric-Wrapped Panels
- Acoustic Foam
- Acoustical Blankets
- Door Seal Kit
- Barrier Blanket
- Mass Loaded Vinyl
- Green Glue
These materials when combined correctly will reduce if not totally soundproof your music practice room.
You can begin by installing the 2-inch thick Anchorage Fabric-Wrapped Panels (click here to see it on Amazon) on the wood paneling. Do this on the lower section of the walls.
After its done, you can then add the Acoustical Foam (click here to see it on Amazon) to the upper section of the walls. Make sure to cover the portion above the drums. This ensures to prevent the sound from reflecting.
If this strategy does not work the way you expect it, you shouldn’t get discouraged. This is because every band rehearsal room is different.
There are other materials that could help you achieve your goal of soundproofing a music practice room.
The other material you can easily add is the Acoustical Blankets (click here to see it on Amazon). You can just hang these blankets on the walls and doors of the music practice room.
These blankets do a very good job of absorbing the sound and preventing it from bouncing back. But the best part of all is that the sound never leaves the room.
Aside from containing the sound inside, the other problem is how to block the sound from the outside noise.
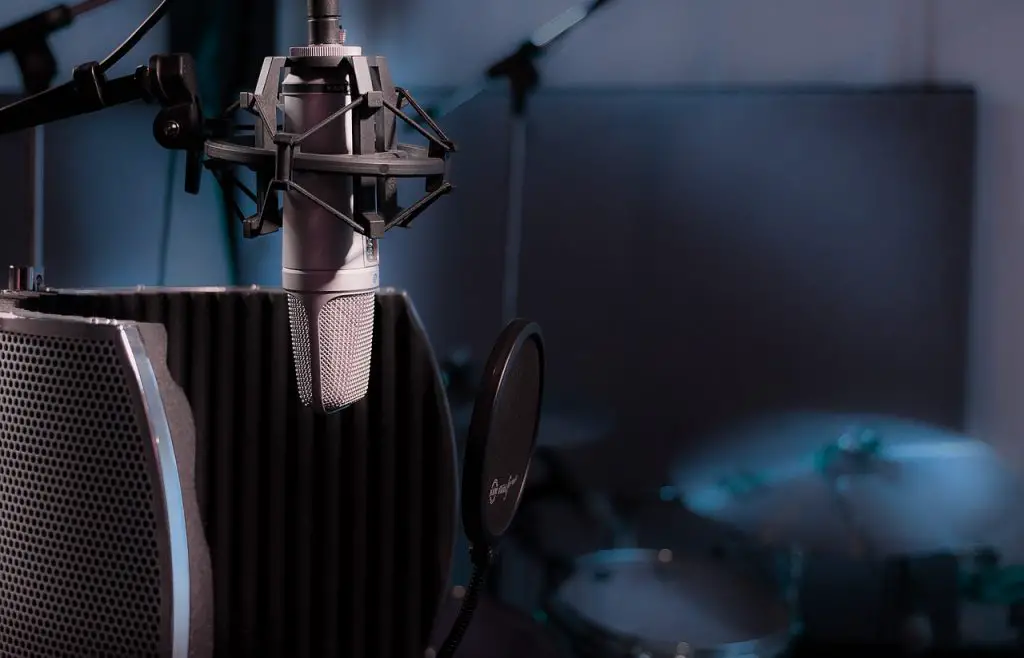
If you are planning to record a song, keeping the room totally quiet can be a tremendous challenge.
You don’t want to compromise everything that you have invested so much effort for weeks or even months.
So how can you prevent the outside noise from entering the music room?
The first crucial step here is figuring out the spots in the room that sound could possibly go through.
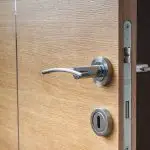
One of the common sound passages is the door. This happens when the door is not solid and heavy. Hollow doors are good in blocking the sound from the outside.
The gaps around the windows and doors are perfect spots for the outside noise to sneak in.
Fortunately, you can easily close the gaps using the door seal kit (click here to see it on Amazon). This is one of the effects soundproofing materials you can trust when it comes to damping the sound from entering your music room.
However, dealing with windows can be a different story. This is because windows usually have flimsy structures making them difficult to soundproof.
One of the best solutions, however, is to use the barrier blanket. This soundproofing material is so easy to use. You just need to hang it to cover the windows.
This material does not only block sound but also serves as the insulation to the windows and walls. A double purpose so to speak.
But windows and doors are not the only weak spots in the room. Sometimes, the ceilings and the floors may also contribute to the challenge and difficulties in soundproofing music practice rooms.
Fortunately, there are materials that are specifically designed for this purpose. Some of the most effective materials you can use are the Mass Loaded Vinyl (click here to see it on Amazon).
Mass loaded vinyl is another reliable and versatile soundproofing materials you can use in different soundproofing projects.
In my previous post on how to soundproof ceiling in apartments, I used mass loaded vinyl to eliminate the sound from neighbors above.
Mass loaded vinyl is super easy to install. Using a green glue (click here to see it on Amazon), you can easily paste it on the areas you want to soundproof.
On Soundproofing a Music Practice Room
If you do these techniques, you have a high chance of succeeding in soundproofing a music practice room.
All you need to do is to find a perfect space to make your own music practice room.
After that, you can proceed to the soundproofing project.
But soundproofing a music practice room can be different from soundproofing a room for music listening and recording.
Although I talked about the recording above, it may not be enough. This is because a recording room has a unique and high-quality tranquility requirement than the band rehearsal room.
Here, let me further share some tips for soundproofing room for music listening and recording.
How to Soundproof a Room for Music Listening and Recording?
Soundproofing a room for recording can be a lot tougher than soundproofing a music practice room.
A recording room needs to be completely quiet. This means that soundproofing strategies should work.
The only way to tell that it does is when you don’t hear any noise from the outside.
Although I already shared some techniques and materials above, you might still want some more to simply have more options.
The combination of the two or more techniques will give you a better chance of success in your soundproofing process.
Soundproofing a Room for Music

The techniques you are about to learn, if applied correctly, will help you to:
- Block the outside noise and make your music room quieter
- Make the best soundproof music room for recording
- Make the best soundproof room for music listening
- Be ultimately proud of your success in the whole soundproofing process
Some tips before we dive into the several recommended strategies. I want you to remember that although each strategy works, sometimes the combination between these strategies and your creative power will increase your chance of succeeding.
That’s it. Let’s get into the strategies for soundproofing a music room.
1. Use Soundproof Curtains or Blankets
Soundproof curtains or blankets are great materials to control or reduce the sound from entering or leaving the room.
If the music is adjacent to a nursery room, you’ll find it extremely helpful to be able to make the music room quieter.
The great materials you can use to achieve such a goal are either of the two.
Soundproof blankets (click here to see these on Amazon), for instance, are designed to reduce the undesirable noise that enters the room.
These materials are not only good in blocking the sound from the outside but also great in inhibiting the sound from escaping outside.
Soundproof blankets are just blankets with special power to absorb sound. If you are soundproofing a music recording room, this is a perfect material.
However, honestly, as mentioned, soundproofing a recording music room demands high-quality quietness.
That said, soundproof blankets may not be enough depending on the location of your music room.
For better results, you need to match it with soundproof curtains (click here to see these on Amazon). These materials do not only soundproof the room but also provide the added aesthetic value of the music room.
All you need to do is to choose a certain color that fits with the interior ambiance and design.
For better soundproofing outcome, combine these two soundproofing materials. Soundproof blankets and curtains will surely change the music room from noisy to a quieter space.
2. Block the Noise Using Bookshelves
This is not what you commonly read from advice online when it comes to soundproofing a music room.
But you read it right. Bookshelves can have great impact on your soundproofing project. This means that if you have bookshelves in your house, you already have a free tool to soundproof a room.
What bookshelves do is block both the outgoing and incoming noise by absorbing the sound. They act as absorber and barrier.
But bookshelves work well if they are big and full of books. The best is the one that covers the whole wall.
If you don’t have such bookshelf, and you want to use it for soundproofing, you can order a big bookshelf (click here to see it on Amazon) from online suppliers.
At this point, you might start to think that soundproofing is only a matter of creativity. And you’re right!
3. Keep Everything Stable in the Room
What I mean by this is to put all the room equipment on a solid, not on the shaky receptacle.
The reason for this is that the sound causes vibrations. The loud noise from your neighbors’ speakers could shake the roof and other things in your house.
This happens when the sound hits on something that is not fixed or stable. Soundwaves are powerful enough to cause movements on the things around them.
The best thing you can do is place everything on solid platform. If the stand of your speaker, for instance, is shaky, you better mount the speaker.
Another way is to install insulating vibration pads (click here to see these on Amazon). These materials are designed to eliminate vibration.
Combining the right strategy and the right soundproofing materials will ensure a high chance of success.
This way you can avoid the damaging effect of the loud noise.
4. Install Weatherstrip on Doors
One of the toughest challenges when soundproofing a music room is dealing with noise that goes through the doors.
Although you implement the previous techniques mentioned above, there is still a chance that the room is not completely sealed.
Remember that little gap between the floor and the bottom of the door? That space is a perfect sound passage where noise can penetrate through.
But there is a great solution for that. Use the weatherstrip (click here to see it on Amazon). I talked about this soundproofing material in my previous post on soundproofing pocket doors.
A weatherstrip is also known as door sweep. It is made of either plastic or metal commonly used to seal the gap between the bottom of the door and the floor.
Weatherstrip does a very good job in:
- Blocking the sound from the outside
- Containing the sound inside
- Blocking insects or bugs and other small intruders that pass through the bottom of the door
These are just a few benefits you can get from implementing weatherstrip. Of course, there is a lot more you’ll discover.
5. Use Acoustic Panels
I have already talked about this earlier. But I want to emphasize it here if you want a better result when soundproofing a music room.
Acoustic panels (click here to see these on Amazon) are great soundproofing materials for insulating low and high frequency.
Because these materials come with adhesive, you can easily paste it on the walls or areas you want to fix.
You just need to press the acoustic panels on the surface then you are good to go. This is probably one of the easiest soundproofing materials you can find for your project.
If you bought the acoustics that doesn’t have adhesive, you can easily achieve the same result by using spray adhesive (click here to see it on Amazon).
Spray adhesive is a glue that holds the acoustic panels on the walls or ceilings.
For better results, cover all the walls or ceilings. But if you decide to apply it to a certain section of the room, it is totally fine.
For the best possible result, however, I recommend that you use the acoustic panels with fiberglass (click here to see it on Amazon) instead of regular acoustic panels.
Obviously, this one is better than the former. Fiberglass is a great sound-blocking material. So if you combine it with other soundproofing materials, the result will simply be astonishing.
There will be no sound or noise could penetrate or leave the music practice room or the music for the listening room.
Construct a Soundproof Music Room
So far we’ve covered a lot on how to soundproof an existing music practice room or a music room for music listening.
The techniques being shared are only applicable to a constructed room.
But what if you are just currently in the process of constructing a music room in the house? Can you build a soundproof music room?
Absolutely, yes. Although this process requires certain types of materials and a lot of effort, it is definitely a better one.
So, what are the techniques you can do or materials you need to build a soundproof music room?
- Use Thick and Durable Materials
When it comes to soundproofing, using thicker materials is always a better idea.
A 1.6 cm drywall is a good level of thickness you can start with. In most cases, this thickness can be enough for absorbing or blocking the noise.
Build the room as durable as possible. This will help if you do some improvements later on.
- Build Layers of Walls
For effective and successful soundproofing music room, building a second layer wall is always a good idea.
The reason for this is that the sound or noise can be easily absorbed or trap inside in the space between walls.
The effectiveness of these techniques does not depend on the walls but on the space between the gaps.
The wider the space between walls the more effective it will be in trapping the sound.
- Place Sound Clips or Residual Channels
Sound clips and residual channels are great materials to enhance the soundproofing effectiveness.
Install these materials between the studs and the walls. They will help you achieve the outcome that you want.
When installed correctly, sound clips (click here to see these on Amazon) are great supplemental materials for your soundproofing project.
Resilient channels (click here to see these on Amazon) too are great additional soundproofing materials. All you need to do is install these materials into studs before installing the drywall.
This should reduce the noise or sound.
- Add Sound Damping Materials in Between Walls
This process is easy if you are just in the process of building the walls or the entire room.
This is obviously difficult, expensive, and arduous if done after the construction.
So before you construct a room, think about the purpose of the room. In my experience, constructing a music room requires more materials and effective strategies to do so.
This strategy works well for bass or loud drums. Perfect for decreasing low-frequency sounds.
- Add Fiberglass
As mentioned earlier, fiberglass is a great way to contain and block sound. The best part is that this material is inexpensive.
With a variety of choices, it is hard to choose which material is perfect for your project. The only person who could tell is you.
This is because every music room is different. So find what works for your project.
- Fix all the Crevices and Cracks
Soundwaves are really good at finding a way to enter or exit the room. And the perfect pathways are the crevices and cracks.
If after installing all the materials and after applying all the strategies mentioned, you still hear noise or sound from the outside, check the cracks or holes on the walls or doors.
If you found them, use an acoustic caulk (click here to see it on Amazon) to seal them. This soundproofing material is effective in sealing small gaps and holes on the wall.
Because acoustic caulk comes with different colors, make sure you pick one that blends with the internal design and color of the room.
For best results, read the product instructions before using it.
- Soundproof the Ceiling and Floor of the Room
Soundproofing a music room is similar to soundproofing a ceiling in apartments. The best way to do is by using acoustic foam panels (click here to see these on Amazon).
Acoustic foam panels do a very good job of containing and blocking the outgoing or incoming sound.
To read more about soundproofing ceilings, read my article here.
Soundproofing a floor, however, can be a different story. It is easily done if you own the house. But if you are living in an apartment, soundproofing a floor can be challenging.
If you own the house, you can simply put a carpet on the floor. That should help reduce if not eliminate the noise entering the room below.
After this simple process, you should not hear footsteps. Thicker carpets work better than the thin ones. So choose your carpet carefully with the purpose in mind.
- Add Soundproofing Panels
I have mentioned that soundproofing panels are great for ceilings. But you can also use it for walls.
Decide where should you put it. This will add to the aesthetic value of the room if implemented properly.
But the very purpose is to enhance your defense against noise or sound that could enter the music room for.
On Soundproofing Music Room for Listening
Most of the strategies I shared are inexpensive. If implemented correctly, there is a high chance that you will achieve your goal.
However, depending on the structure of the room and other factors, not every strategy may work well.
Sometimes, you need to spend money to achieve the kind of soundproofing outcome you want.
This is because not all materials mentioned in this post are cheap. Some are expensive.
So it is your job to figure out what does work and what doesn’t.
Final Thought
Either soundproofing a music practice room or soundproofing a room for music listening, the process is almost the same. You can use many of these same techniques to soundproof a gaming room as well.
But the materials you need for each soundproofing project may be different.
In most cases, it is not about how much budget you have, but how creative you are that determines the outcome.
That said, if you are creative, soundproofing a music practice room for you can be easy and hassle-free.